Sort photos into albums and folders
Part ofPhotosKeep
Your photos already line up by date on their own. You can also keep the photos you choose in their own place. There are four ways to do it.
| Way | Use it when |
|---|---|
| Favorites | You want to mark the photos you love. |
| Folders | You want to keep your photos in separate boxes, such as “School” or “Papers”. |
| Albums | You want to give a set of chosen photos a name, such as “Our weekend”. |
| Archive | You do not want to delete a photo, but you want it out of the Photos screen. |
Favorites, folders and albums never delete or move your photos. The photos stay in date order on the Photos screen too.
When it helps
Section titled “When it helps”- You want to pick the ten best photos out of hundreds and show them to your family.
- You want all the photos of your child’s drawings and awards in one folder.
- You want to mark photos now that you might put in a photobook later.
Choose several photos
Section titled “Choose several photos”Sorting starts with choosing photos.
- On the Photos screen, tap “Select”.
- Tap each photo you want.
To stop choosing, tap “Cancel” at the top left.
Add to favorites
Section titled “Add to favorites”- Choose your photos.
- Tap “More”, then “Add to favorites”.
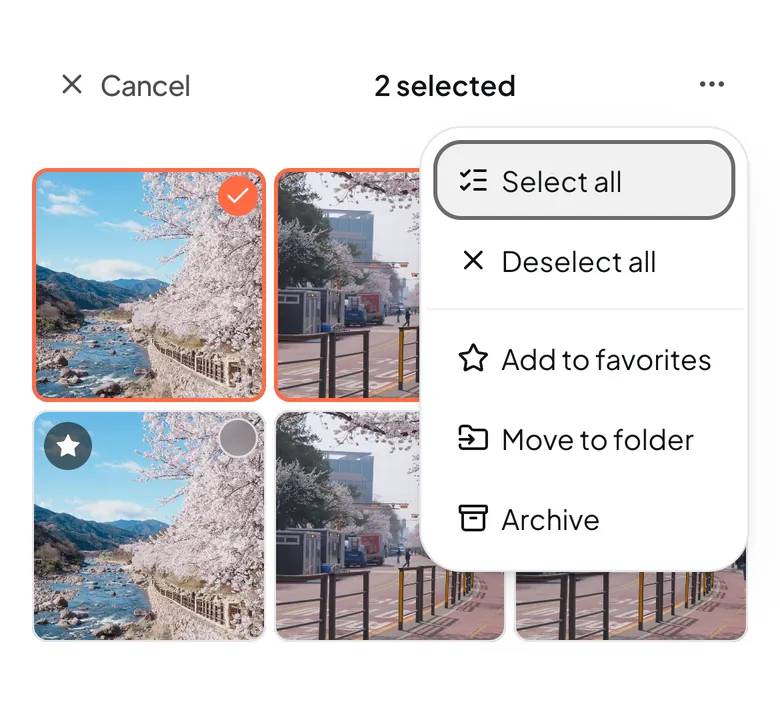
To see only your favorites, tap the “Show” button above your photos and choose “Favorites”.
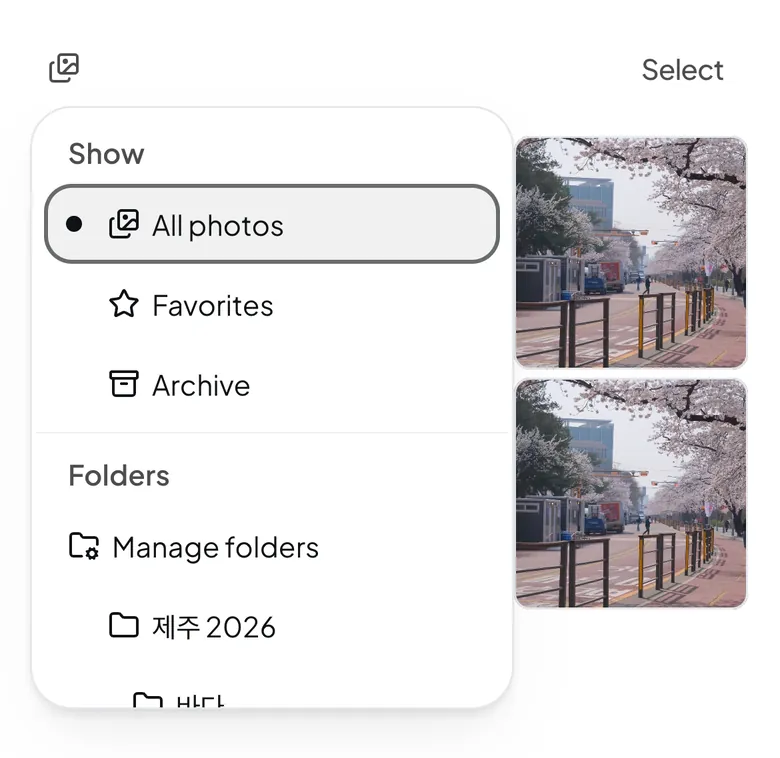
Move to a folder
Section titled “Move to a folder”- Choose your photos.
- Tap “More”, then “Move to folder”.
- Under “Choose a folder”, pick a folder. For a new one, type a name in “New folder name” and tap “Create”.
- Tap “Move”.
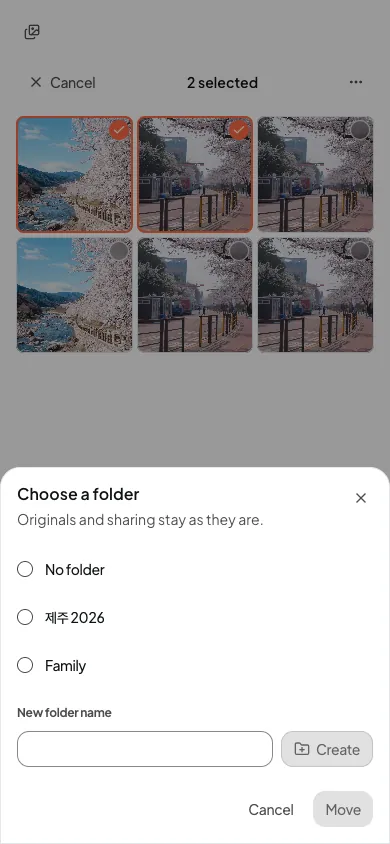
To see the photos in a folder, open “Show” and choose the folder’s name. To rename or delete a folder, open “Show” and tap “Manage folders”. Deleting a folder never deletes your photos. They stay on the Photos screen.
Archive photos
Section titled “Archive photos”- Choose your photos.
- Tap “More”, then “Archive”.
Archived photos leave the Photos screen and go to “Archive”. To bring them back, open “Show”, choose “Archive”, choose the photos, then tap “More” and “Unarchive”.
Make an album
Section titled “Make an album”- On the Photos screen, tap “Albums”.
- Tap “New album”. If you have no albums yet, tap “Make an album”.
- In “Step 1 · Pick photos”, choose the photos for the album.
- Tap the button that shows your count, such as “Create with 10 photos”.
- In “Step 2 · Name it”, type the album’s name in “Name”.
- Tap “Create”.
If you see “Where to keep it”, choose whether the album stays with your own photos or goes in a space you share with family. In a space, every member sees the same album. You cannot change this later.
Add photos to an album you already have
Section titled “Add photos to an album you already have”- Choose your photos.
- Tap “Add to album”.
- Pick the album.
- Tap the button that shows your count, such as “Add 3 photos”.
One album can hold up to 500 photos.
Change the order or take a photo out
Section titled “Change the order or take a photo out”- Open the album and tap “Edit”.
- Press and hold a photo, then drag it to a new spot. Tap X on a photo to take it out of this album only.
- Tap “Save”.
The album’s order is also the print order when you make something from it.
Note
Deleting an album never deletes its photos. An album needs at least one photo.
If it doesn’t work
Section titled “If it doesn’t work”- You see “You can organize only photos you uploaded”: Favorites, folders and the archive work only on photos you added. Leave out photos someone else added and try again.
- You see “You cannot create albums in this space”: Your role in that space only lets you look. Ask the space’s owner to change your role.
- You see “Some photos are not in that space yet”: An album in a space can only hold photos shared to that space. If they are your photos, share them to the space first.
Read next
Section titled “Read next”The chat could not open. Please email us at contact@firstage.ai