Make calendars and postcards
Part ofPhotobooks, calendars and postcardsMake
A calendar brings back a favorite photo every month for a whole year. A postcard or a photo card says something with one photo and a few words. Both are under ‘Make’ in the menu, and you can make them for free on every plan.
When it helps
Section titled “When it helps”- You pick one photo for each month of your child’s year and hang the calendar at your parents’ home.
- You make a postcard from the best photo of a trip and give it to someone who was there.
- You want small photo cards to carry in your wallet.
Make a calendar
Section titled “Make a calendar”- In the menu, under ‘Make’, tap ‘Calendars’.
- Tap ‘Make a calendar’.
- Under ‘Calendar type’, choose ‘Desk calendar’ or ‘Wall calendar’.
- Choose at least 13 photos: one for the cover and one for each month from January to December.
- Tap ‘Next’.
- Under ‘Set up the dates for your calendar’, choose the year and the first day of the week. You can also add days like birthdays.
- Tap ‘Choose a theme’.
- Under ‘Choose a theme for your calendar’, pick a theme. If you don’t pick one, the calendar has no theme.
- Tap ‘Next’, then under ‘Ready to make it?’ tap ‘Create a calendar’, which shows how many photos you chose.
The new calendar is in ‘My calendars’, shown as ‘12 months from’ a month.
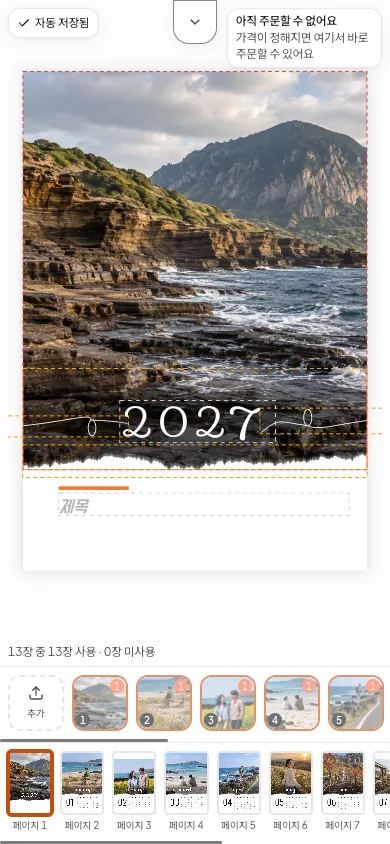
- Photos fill the cover and the months in the order you see them.
- How many photos fit in a month depends on which way each photo faces. If not all of them fit, you see how many of your photos fit this calendar. You can swap in the rest while you edit.
- You can also change the theme, the year and special days in the editor.
Ordering a calendar
Section titled “Ordering a calendar”When the editor shows an order button and a price, you order there. While orders are not open, you see ‘Orders aren’t open yet’ and ‘You can order here once the price is set’. Your calendar stays in ‘My calendars’ either way.
Make postcards and photo cards
Section titled “Make postcards and photo cards”- In the menu, under ‘Make’, tap ‘Postcards and photo cards’.
- Tap ‘Make postcards and photo cards’.
- Under ‘Card type’, choose ‘Photo postcards’ or ‘Mini photo cards’.
- Choose photos. Each photo becomes one card.
- Tap ‘Create a set’, which shows how many photos you chose.
The editor opens. You can open the set again later from ‘My postcards and photo cards’.
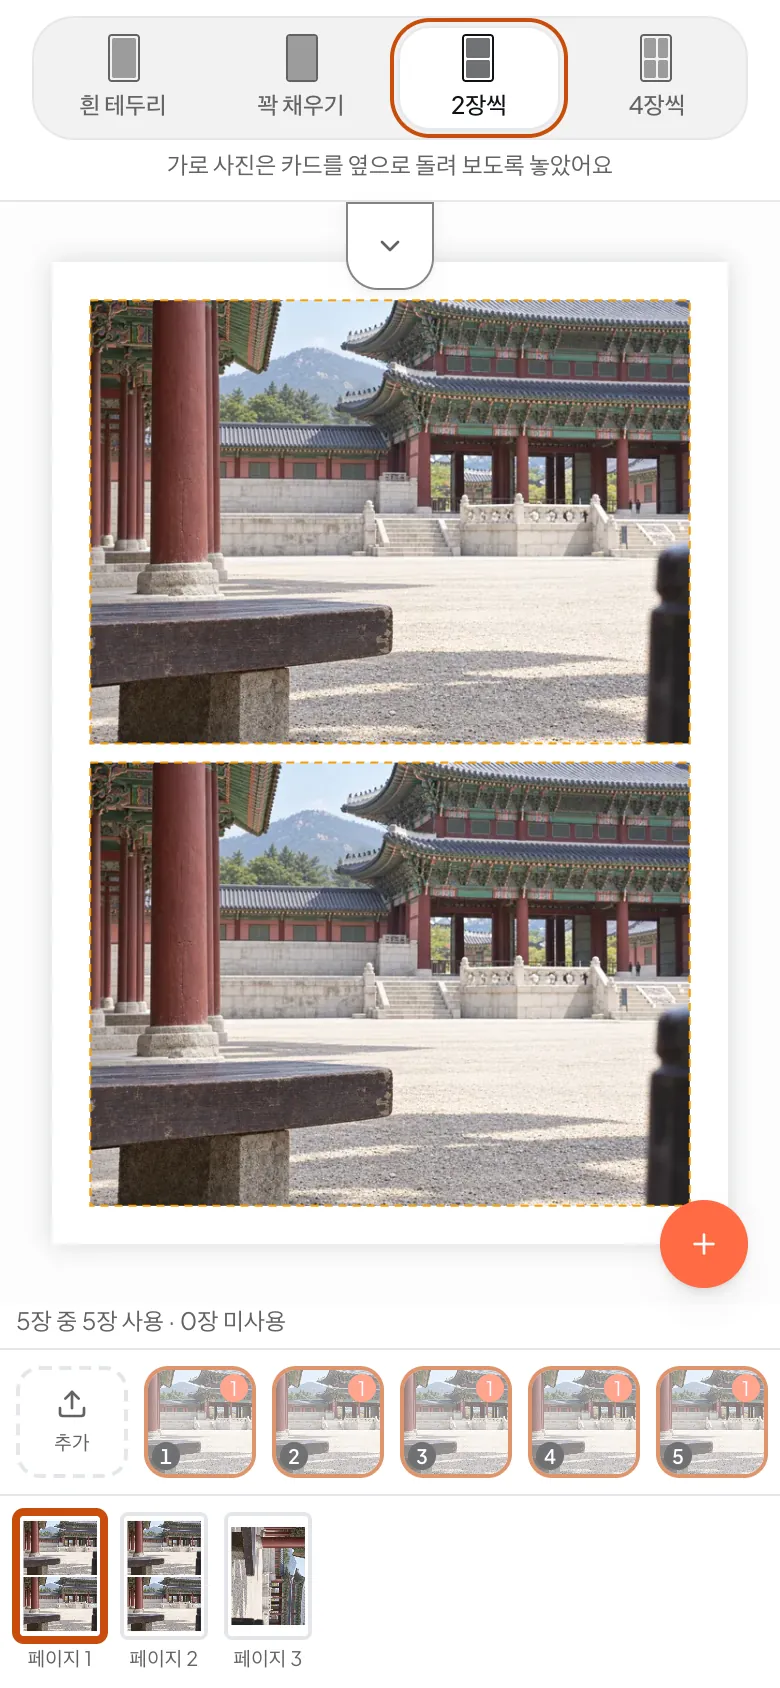
- In the editor, under ‘Photo layout’, choose ‘White border’, ‘Edge to edge’, ‘2 per card’ or ‘4 per card’.
- You can add a few words to a card.
- Check how it looks with ‘Preview’. Tap ‘Download preview PDF’ to get the current look as a PDF. The PDF is only for checking.
Postcards and photo cards can't be ordered yet
For now you can make them and keep them. Print orders are not open yet.
If it doesn’t work
Section titled “If it doesn’t work”- You see that you need more photos. A calendar needs at least 13 photos. Choose a few more.
- You see ‘Created without public holidays’. A little later, tap ‘Apply calendar settings’ in the editor to add holidays.
- You see ‘We couldn’t read colours from your photos’. The calendar uses the basic colours. In the editor, tap ‘Apply to the calendar’ to read the colours again.
Read next
Section titled “Read next”Still have a question?You can ask the Firstage team in a chat.
The chat could not open. Please email us at contact@firstage.ai